The forehand smash in table tennis stands as the quintessential aggressive stroke, a direct, high-velocity shot designed to conclude rallies decisively. Renowned for its unparalleled speed and formidable power, it is arguably the most challenging shot for an opponent to return effectively, frequently resulting in an outright point or forcing a defensive maneuver that cedes strategic advantage. Mastering this explosive technique is not merely an optional skill but a foundational pillar for any player aspiring to competitive success in the modern era of table tennis.
The Strategic Imperative of the Smash
At its core, the primary objective of a smash stroke is point termination. Unlike shots that prioritize spin, such as the loop, or those focused on control and placement, the smash places an overwhelming emphasis on raw speed and force. This makes it the ideal weapon when the ball is presented with a high bounce above the net, offering a clear opportunity for a direct, downward trajectory strike. Sports analysts frequently highlight the smash as a critical differentiator in high-level matches, noting its capacity to disrupt an opponent’s rhythm and dictate the pace of play. Statistical analyses of professional tournaments indicate that forehand smashes account for a substantial percentage of outright point winners, often exceeding 35-40% in matches involving offensive-minded players. The psychological impact of consistently executing powerful smashes can also be significant, instilling a sense of urgency and pressure on the receiving player.
A Step-by-Step Dissection of the Forehand Smash
The execution of a forehand smash involves a sophisticated kinetic chain, a precise sequence of body movements that converts potential energy into explosive racket head speed. The fundamental principle is to strike the ball with a flat racket angle, moving directly down and forward, ensuring that speed and penetration override spin generation. This direct contact maximizes the ball’s velocity, making it incredibly difficult for the opponent to react in time.
Phase 1: The Backswing – Building Potential Energy
The backswing is the critical preparatory phase where potential energy is accumulated. It is far more than a simple arm movement; it integrates the entire body. A common mistake among developing players is to rely solely on arm strength, leading to diminished power and rapid fatigue. Instead, elite players emphasize a comprehensive body rotation and weight transfer.
- Stance and Weight Transfer: The player typically adopts an open or semi-open stance, with the dominant foot slightly behind the non-dominant foot. As the ball approaches, weight begins to shift to the dominant leg.
- Hip and Torso Rotation: The hips and torso initiate a significant rotation, often twisting approximately 90 degrees away from the incoming ball. This rotation serves as a powerful spring, coiling the body and maximizing the arc of the swing. The racket arm naturally extends backward and slightly downwards, positioning the racket far from the ball to allow for maximum acceleration.
- Shoulder and Arm Positioning: The shoulders rotate with the torso, and the hitting arm is relaxed yet prepared. The elbow is typically bent, and the wrist remains relatively fixed, avoiding any pre-emptive flicking motion that could compromise stability and power. The goal is to create the longest possible stroke length, maximizing the time and distance over which the racket can accelerate.
Phase 2: Contact – The Moment of Truth
The contact point is where the accumulated potential energy is transferred to the ball, demanding precise timing and optimal racket angle.
- Forward Weight Transfer: As the backswing completes, the weight rapidly shifts from the dominant back leg to the non-dominant front leg, driving power through the hips and torso.
- Uncoiling and Arm Acceleration: The coiled hips and torso rapidly uncoil, initiating a powerful rotational force. This rotation propels the shoulder, then the upper arm, forearm, and finally the racket head forward and slightly downward towards the ball. The arm accelerates explosively through the hitting zone.
- Optimal Contact Point: The ideal contact point is generally at the peak of the ball’s bounce, often around shoulder-to-head height. The racket face should be relatively flat, impacting the ball squarely to maximize direct forward momentum. While a minimal amount of topspin can be imparted for control, the primary focus remains on speed. The striking motion is a powerful "hammering" action, driving the ball into the opponent’s side of the table.
Phase 3: Follow Through – Sustaining Momentum and Balance
The follow-through is crucial for dissipating residual energy, maintaining balance, and preparing for the next shot.

- Completion of Swing: The racket continues its trajectory after contact, typically sweeping across the body in a downward and forward arc.
- Body Balance and Recovery: The body naturally rotates further, with the dominant shoulder often pointing towards the net. The weight transfer is completed, and the player returns to a balanced, ready stance, prepared for any potential return. An appropriate follow-through ensures the entire kinetic chain has been utilized effectively and prevents injury.
Developing Killer Power for Your Smash
The essence of a high-quality smash lies in its power. Maximizing this power hinges on the efficient storage and release of potential energy throughout the stroke. Many novice players err by over-emphasizing arm strength, leading to a "choppy" swing that lacks the full kinetic chain’s power. This approach not only tires the arm quickly but also produces significantly inferior smashes.
The secret weapon for power generation is the proper utilization of the lower body and core. This involves:
- Weight Transfer: The seamless transfer of weight from the back leg to the front leg provides a foundational thrust.
- Hip and Torso Rotation: A powerful twist at the hips and torso, often a rotation of 90 degrees or more during the backswing, acts as the primary engine for racket head speed. This rotation, followed by an explosive uncoiling, generates immense centrifugal force.
- Adequate Stroke Length: As previously mentioned, a longer backswing, positioning the racket as far away from the ball as possible while maintaining control, allows for a greater distance over which to accelerate the racket, thus building more speed.
Top coaches routinely demonstrate how integrating the legs, hips, and core into the smash amplifies power far beyond what arm strength alone can achieve. This integrated approach ensures that the entire body contributes to the stroke, making it both more powerful and less fatiguing.
Advanced Ping Pong Smash Tips for Enhanced Performance
Beyond the fundamental mechanics, several nuanced aspects contribute to a truly devastating smash.
- Maintain a Fixed Wrist: Given that smashes prioritize speed over spin, excessive wrist engagement is counterproductive. Attempting to "flick" the wrist often destabilizes the racket face at contact, reducing power and control. A firm, fixed wrist throughout the stroke ensures a solid impact and directs maximum energy into the ball.
- Prioritize Forehand Smashes: In table tennis, the forehand smash is overwhelmingly superior to its backhand counterpart. The biomechanics of the human body naturally allow for a more powerful and expansive forehand swing, involving greater hip and torso rotation. Backhand smashes are seldom seen in high-level play due to their inherent limitations in power and consistency. When presented with a high ball, even if it’s on the backhand side, players are almost always advised to reposition and execute a forehand smash. The adage "forehand smash > backhand smash" holds true across all competitive levels.
- Optimal Distance from the Ball: A common pitfall for beginners is standing too close to the ball. This forces them to lean away from the shot, compromising balance and stripping the smash of its potential power. Proper distance management is crucial. Players should practice maintaining enough space to execute a full, unhindered backswing and follow-through. When in doubt, taking a small step back is often preferable, as it’s easier to adjust forward with a larger step during the swing than to compensate for being too close.
- Strategic Placement Over Raw Speed: While speed is a hallmark of the smash, its effectiveness is often amplified by intelligent placement. A medium-speed smash directed to an unexpected location can be far more effective than a blistering but predictable shot straight at the opponent. Players should actively observe their opponent’s court positioning and anticipate potential defensive vulnerabilities. Techniques like faking a smash in one direction and then quickly redirecting it to the opposite side can be incredibly deceptive and lead to easy points.
- Experiment with Contact Height: The "golden zone" for contacting the ball during a smash is generally considered to be between shoulder and head height. However, this is not a rigid rule. Many professional players, exhibiting exceptional timing and athleticism, strike the ball from above head height, generating devastating angles and power. Conversely, it is also possible to strike the ball slightly below shoulder height, though this carries a higher degree of risk due to the closer proximity to the net and the narrower margin for error. The ultimate goal is to strike the ball at a comfortably high position well above the net, maximizing the downward trajectory and minimizing the chance of hitting the net. Adaptability in contact height allows for greater versatility in attacking various incoming balls.
Smash vs. Drive: Differentiating Offensive Strokes
While the forehand smash is a powerful offensive weapon, it is distinct from other aggressive strokes like the forehand drive. Both shots involve a relatively direct contact with the ball, prioritizing speed over extreme spin, a characteristic that differentiates them significantly from loops, which primarily rely on a brushing motion to generate high levels of topspin.
However, key differences exist:
- Racket Angle: Forehand smashes typically employ a flatter racket angle than forehand drives. This is because the ball usually bounces much higher when a smash opportunity arises, negating the need for significant topspin to control the trajectory over the net. Drives, often executed from lower ball heights, require more topspin to ensure the ball clears the net and dips onto the table.
- Speed and Control: Smashes are unequivocally the fastest shots in table tennis, designed for maximum velocity and point termination. Drives, while aggressive, often involve a greater degree of control and are used to set up future attacks or maintain pressure in a rally. A drive might aim for consistent depth and spin, while a smash aims for an unreturnable speed.
- Strategic Intent: A smash is a clear "finishing" shot, a calculated risk taken to end the point immediately. A drive can be a finishing shot, but it also serves as a potent attacking rally shot, designed to push the opponent back and create openings.
Returning the Onslaught: Countering a Smash
Successfully returning a forehand smash is one of the most challenging defensive feats in table tennis, demanding exceptional reflexes, footwork, and tactical acumen. There are two primary strategies employed by defenders:
- The Lobbed Return: The ideal defensive maneuver against a powerful smash is often to quickly move away from the table and execute a lobbed return. By creating greater distance between oneself and the incoming ball, the defender gains crucial milliseconds to react, track the ball’s trajectory, and prepare their stroke. A lob involves lifting the ball high into the air, often with significant topspin, to gain time to recover position and force the attacker to execute another powerful stroke. This strategy aims to neutralize the attacker’s power by forcing them into a repeated offensive effort, hoping for an error or a weaker follow-up shot.
- The Block: The second option is to hold one’s ground closer to the table and play a block. Blocks have the advantage of requiring minimal backswing; the immense pace of the incoming smash is used against itself. The defender essentially "absorbs" the ball’s energy with a firm, slightly closed racket face, redirecting it back to the opponent’s side with controlled placement. However, this method demands incredibly quick reactions and precise racket positioning due to the limited time available. A mistimed or improperly angled block can easily send the ball long or into the net. Elite defenders often employ subtle variations of the block, such as active blocks that add a slight amount of forward momentum or passive blocks that simply reflect the ball’s speed, to keep attackers guessing.
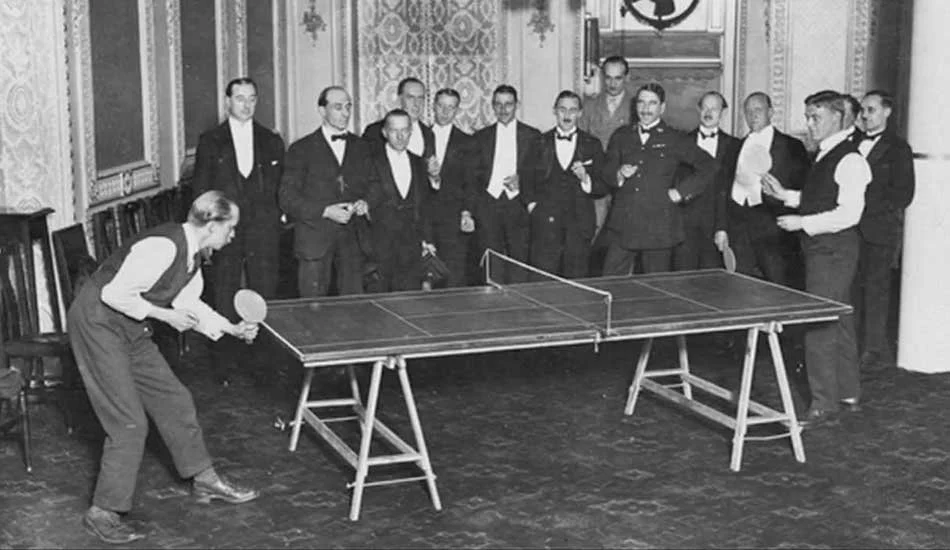
In conclusion, the forehand smash remains an indispensable and formidable weapon in table tennis. Its mastery requires a holistic understanding of biomechanics, strategic intent, and continuous refinement through dedicated practice. From its historical evolution to its intricate execution and the challenging art of its defense, the smash embodies the dynamic and explosive nature of competitive table tennis. Its impact on match outcomes and player development underscores its enduring significance as the sport’s ultimate offensive statement.